Suchen Sie nach einer schnellen und kreativen Möglichkeit, Ihre Stickereien zur Schau zu stellen?? Rahmenstickerei in einem Stickrahmen ist die perfekte Lösung! Es ist nicht nur praktisch; Es verleiht Ihrem fertigen Stück Charme und Eleganz. Egal, ob Sie es an die Wand hängen oder einer besonderen Person schenken möchten, Diese Methode ist super einfach und macht Spaß, sie auszuprobieren.
In diesem Ratgeber, Sie werden einen einfachen Prozess entdecken, mit dem Sie Ihre Stickerei in ein gerahmtes Meisterwerk verwandeln. Mit nur wenigen Schritten, Ihre Arbeit wird professionell und bereit sein, zu glänzen. Bereit, Ihre Stickerei zu verwandeln? Lass uns eintauchen!
Rahmenstickerei in einem Stickrahmen, detaillierte Methode
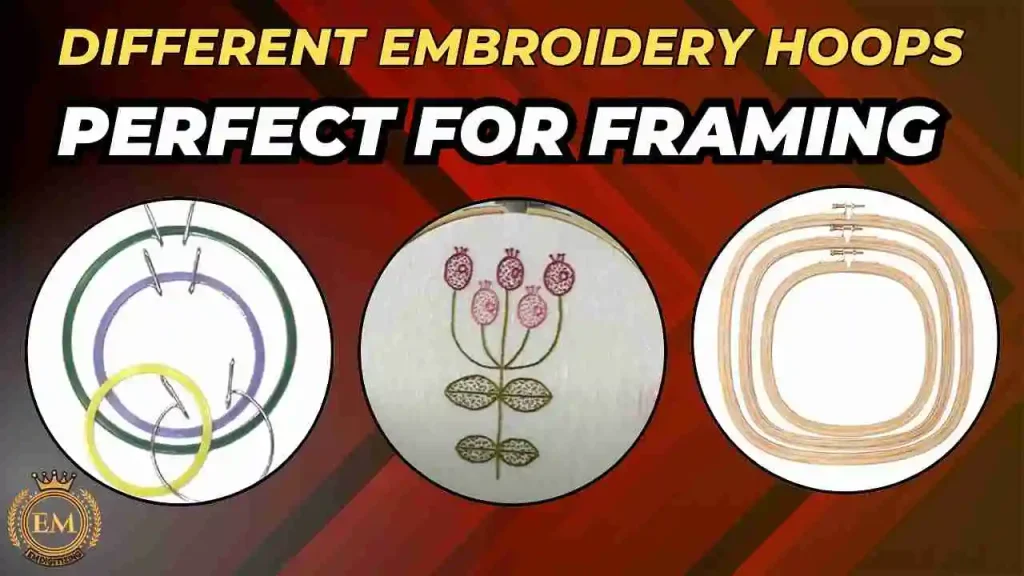
Verschiedene Stickrahmen, perfekt zum Einrahmen
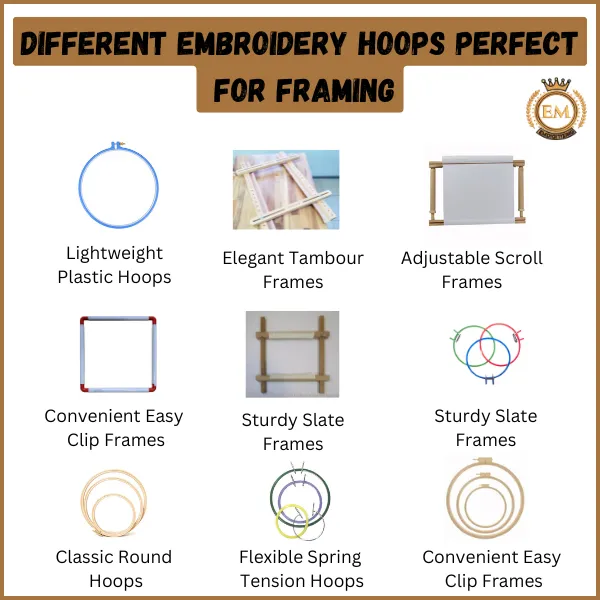
Der richtige Reifen kann den entscheidenden Unterschied machen Rahmenstickerei in einem Stickrahmen. Es trägt nicht nur dazu bei, die Spannung des Stoffes aufrechtzuerhalten, sondern verleiht dem fertigen Stück auch einen ästhetischen Reiz. Klassische runde Reifen sind ideal für traditionelle Designs, während leichte Kunststoffreifen eine erschwingliche und anfängerfreundliche Option bieten. Für größere Projekte, verstellbare Scrollrahmen sind perfekt, Bereitstellung von Flexibilität und Unterstützung. Jeder Reifentyp hat seine Vorteile, Dadurch wird es einfacher, die beste Lösung für Ihre Stickanforderungen zu finden.
- Klassische runde Reifen
- Flexible Federspannreifen
- Große Quiltreifen
- Praktische Easy-Clip-Rahmen
- Stabile Schieferrahmen
- Robuste Metallreifen
- Leichte Kunststoffreifen
- Elegante Rollladenrahmen
- Verstellbare Bildlaufrahmen
1. Klassische runde Reifen
Dies sind die gebräuchlichsten Stickrahmen, aus Holz oder Kunststoff. Sie verleihen der Einrahmung einen zeitlosen Look und eignen sich perfekt für die meisten Arten von Stickprojekten. Ihre Einfachheit verleiht Ihrem fertigen Kunstwerk einen klassischen Charme.
2. Flexible Federspannreifen
Diese Reifen sind mit einem Federmechanismus ausgestattet, der den Stoff fest an Ort und Stelle hält. Sie sind ideal für empfindliche Stoffe, da sie eine hervorragende Spannung bieten, ohne tiefe Spuren zu hinterlassen. Aufgrund ihrer Flexibilität sind sie einfach zu verwenden und eignen sich hervorragend zum Einrahmen.
3. Große Quiltreifen
Perfekt für größere Stickprojekte, Diese Reifen sind für die Bearbeitung größerer Stoffbereiche konzipiert. Sie bestehen oft aus langlebigem Holz und bieten Stabilität, wodurch sie für detaillierte Zwecke geeignet sind, großformatige Designs.
4. Praktische Easy-Clip-Rahmen
Diese Rahmen ermöglichen eine schnelle und sichere Platzierung des Stoffes, dank Clip-Mechanismus. Sie sind ideal für diejenigen, die eine problemlose Einrichtung bevorzugen und ein professionell aussehendes Finish für ihre Stickerei wünschen.
5. Stabile Schieferrahmen
Schieferrahmen sind traditionell und äußerst langlebig. Sie sorgen für eine ebene Oberfläche und eine hervorragende Spannung, was für aufwendige Stickprojekte unerlässlich ist. Sie eignen sich ideal für professionelle Rahmungen und Arbeiten in Erbstückqualität.
6. Robuste Metallreifen
Metallreifen sind robust und langlebig. Sie eignen sich sowohl zum Einrahmen als auch zum Besticken, bietet ein modernes und elegantes Finish. Ihre Haltbarkeit macht sie zu einer guten Wahl für Projekte, die häufige Handhabung erfordern.
7. Leichte Kunststoffreifen
Das Die besten Rahmen zum Einrahmen von Stickereien Dazu gehören Kunststoffreifen, die erschwinglich und einfach zu handhaben sind. Es gibt sie in verschiedenen Farben und Größen, Dadurch sind sie leicht und perfekt für Anfänger oder Gelegenheitsspieler Stickprojekte.
8. Elegante Rollladenrahmen
Diese Rahmen eignen sich perfekt für feine und dekorative Stickereien. Wird oft für Rolladenbördelungen verwendet, Sie sorgen für ein anspruchsvolles Aussehen und eine hervorragende Unterstützung für filigrane Designs, wodurch sie sich ideal zur Präsentation eignen.
9. Verstellbare Bildlaufrahmen
Rollrahmen eignen sich perfekt für lange oder fortlaufende Designs. Dank der einstellbaren Größe und des Scrollmechanismus können Sie an längeren Projekten arbeiten, ohne sie neu einrahmen zu müssen. Sie sind vielseitig und eignen sich sowohl zum Einrahmen als auch zum Sticken.
Benötigte Materialien zum Einrahmen von Stickereien in einem Stickrahmen
Verwendung von Rahmen zur Stickdarstellung erfordert die richtigen Materialien, um ein poliertes und sicheres Finish zu erzielen. Hier ist eine Liste der wesentlichen Elemente:
- Stickrahmen (Wählen Sie den Typ basierend auf Ihrem Design)
- Bestickter Stoff
- Schere
- Stoffkleber oder Klebespray
- Trägerstoff oder Filz
- Nadel und Faden
- Farbe oder Dekorationen für den Reifen (Optional)
Schritt-für-Schritt-Anleitung zum Einrahmen von Stickereien in einem Stickrahmen
Um ein sauberes und professionelles Erscheinungsbild zu gewährleisten, ist Liebe zum Detail erforderlich. Befolgen Sie diese einfachen Schritte, um Ihre Stickerei perfekt einzurahmen.
1. Wählen Sie den rechten Stickrahmen aus
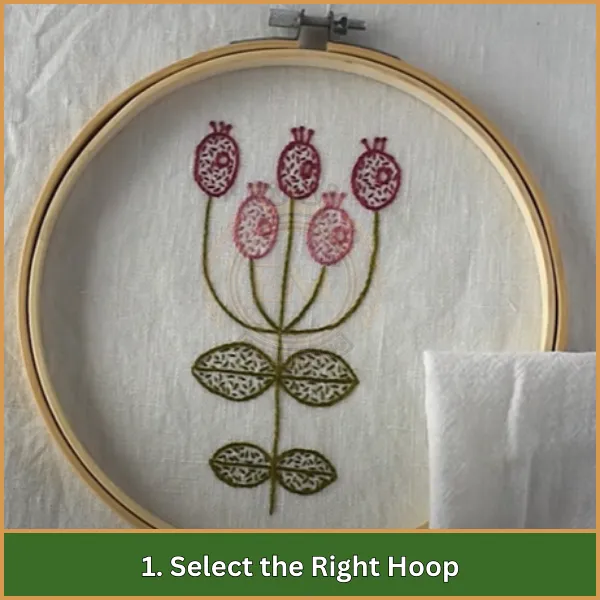
Der erste Schritt besteht darin, einen Reifen auszuwählen, der zu Ihrer Größe und Ihrem Stil passt Stickerei-Design. Für individuelle Stickrahmendesigns, Wählen Sie einen Rahmen, der die Gesamtästhetik Ihrer Arbeit ergänzt. Der Rahmen sollte außerdem für die richtige Spannung sorgen, um den Stoff straff zu halten, sorgt für ein poliertes Finish. Holzreifen bieten einen klassischen Look, während Metall- oder Kunststoffreifen möglicherweise zu moderneren Designs passen.
2. Bereiten Sie den Stickstoff vor
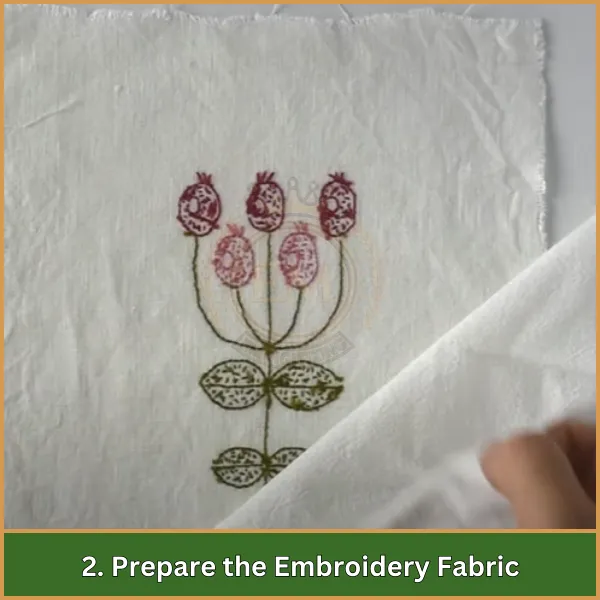
Bevor Sie den Stoff in den Stickrahmen legen, Stellen Sie sicher, dass es sauber und faltenfrei ist. Verwenden Sie bei Bedarf ein mildes Reinigungsmittel, um den Stoff zu reinigen, und bügeln Sie es auf niedriger Stufe, um eventuelle Falten zu entfernen. Sobald der Stoff glatt ist, Schneiden Sie es sorgfältig ab, zumindest gehen 1-2 Zoll zusätzlicher Stoff um die Stickerei herum. Dieser zusätzliche Stoff wird später gefaltet und an der Rückseite befestigt.
3. Legen Sie den Stoff in den Reifen
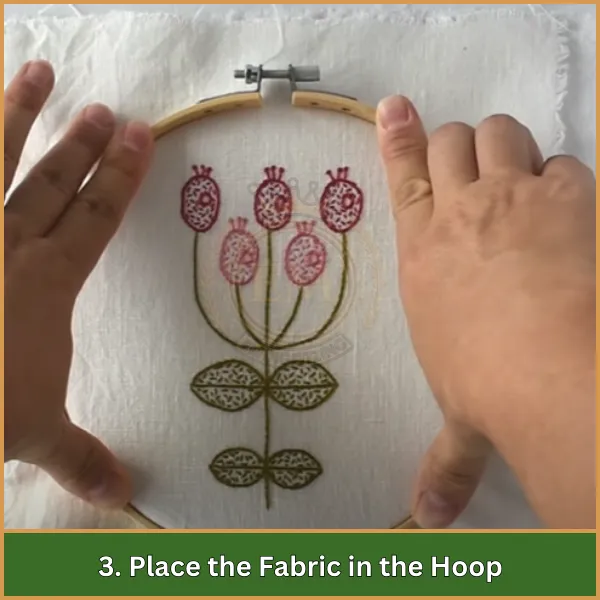
Trennen Sie den Innen- und Außenring des Reifens. Legen Sie den Stoff über den Innenring, Stellen Sie sicher, dass das gestickte Design zentriert und gerade ist. Drücken Sie den Außenring vorsichtig über den Innenring, Den Stoff dazwischen legen. Passen Sie die Positionierung nach Bedarf an, bevor Sie die Schraube oben am Rahmen festziehen. Stellen Sie sicher, dass der Stoff gleichmäßig verteilt ist und keine Falten wirft.
4. Passen Sie die Spannung an
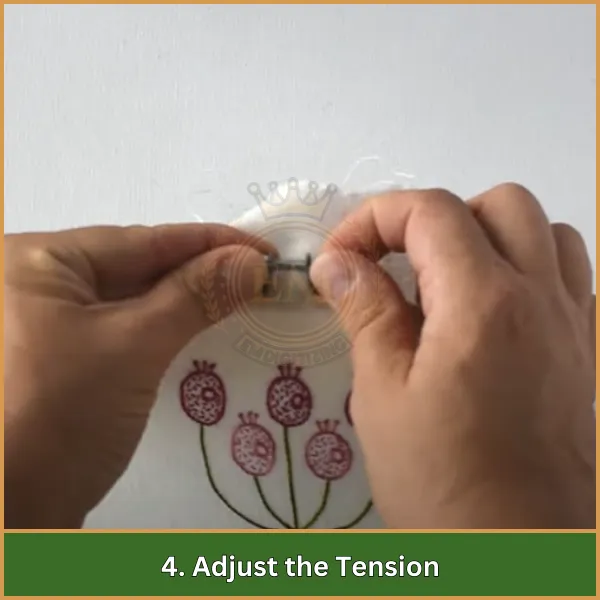
Für ein glattes und professionelles Erscheinungsbild, Ziehen Sie vorsichtig an den Stoffkanten, während Sie die Schraube festziehen. Dieser Schritt stellt sicher, dass die Stickerei im Stickrahmen straff und faltenfrei bleibt. Überprüfen Sie die Spannung noch einmal, indem Sie leicht auf den Stoff drücken – er sollte sich fest, aber nicht übermäßig gedehnt anfühlen.
5. Schneiden und befestigen Sie den Stoff
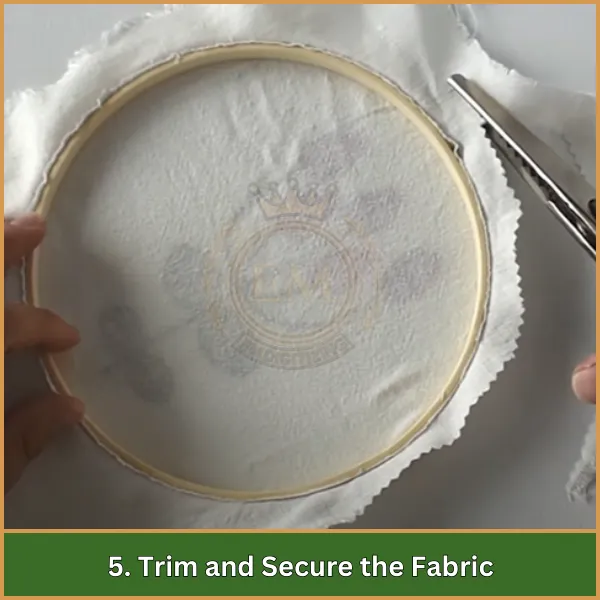
Sobald der Stoff sicher im Stickrahmen sitzt, Schneiden Sie überschüssigen Stoff an den Kanten ab, weggehen 1 Zoll. Falten Sie diesen zusätzlichen Stoff sauber auf die Rückseite des Stickrahmens. Verwenden Sie Stoffkleber, Haftspray, oder durch Handnähen, um die gefalteten Kanten am Stickrahmen zu befestigen. Dieser Schritt hält den Stoff nicht nur an Ort und Stelle, sondern verhindert auch, dass er mit der Zeit ausfranst.
6. Fügen Sie einen Trägerstoff hinzu
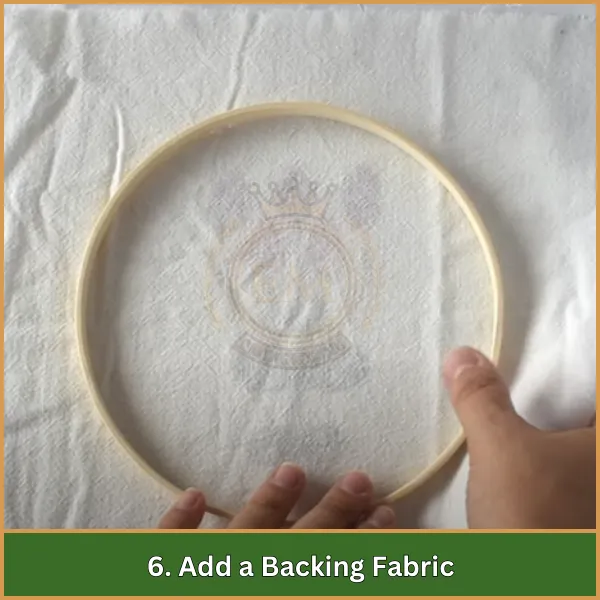
Für ein poliertes Finish, Befestigen Sie einen Trägerstoff wie Filz oder Dekorationsmaterial an der Rückseite des Stickrahmens. Schneiden Sie den Trägerstoff etwas kleiner als die Rahmengröße zu und befestigen Sie ihn mit Kleber oder Nähten. Die Rückseite verdeckt die rohen Kanten des Stoffes und verleiht der Stickerei ein sauberes und professionelles Aussehen, wodurch es sich ideal für die Präsentation eignet.
7. Dekorieren Sie den Reifen (Optional)
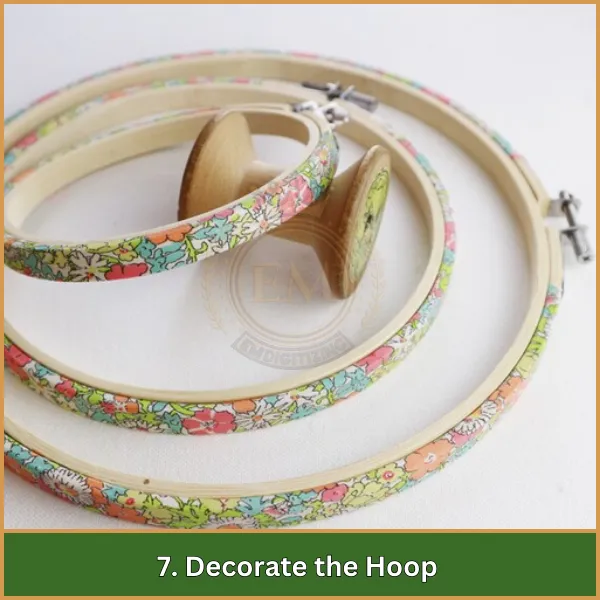
Wenn Sie eine persönliche Note hinzufügen möchten, Dekorieren Sie den Reifen selbst. Sie können die Holzreifen in Ihrer Wunschfarbe bemalen oder mit Bändern umwickeln, Washi-Tape, oder Spitze für einen dekorativen Effekt. Hinzufügen von Verzierungen wie Perlen, Reize, oder Stoffblumen können das Gesamtbild zusätzlich aufwerten.
8. Präsentieren Sie Ihre Stickerei
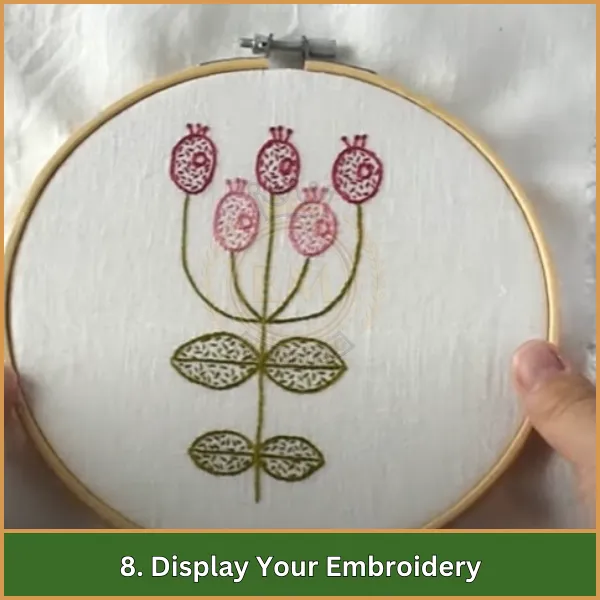
Ihre gerahmte Stickerei ist jetzt zur Präsentation bereit! Sie können es mit einem Haken oder Band an der Wand aufhängen, Stellen Sie es auf ein Regal, oder verwenden Sie es sogar als Geschenk für einen besonderen Menschen. Durch die Gruppierung mehrerer Stickrahmen entsteht eine optisch ansprechende Anordnung, die Ihre Stickfähigkeiten zur Geltung bringt.
Kreative Alternativen zum Einrahmen Ihrer Stickerei
Müde von den üblichen Reifen? Diese einzigartigen Methoden können einen Mehrwert schaffen Rahmenstickerei in einem Stickrahmen zu etwas ganz Besonderem:
- Gestalten Sie es wie ein Meisterwerk: Platzieren Sie Ihre Stickerei in einem herkömmlichen Bilderrahmen, Befestigen Sie es zum Polieren auf einem Trägerbrett, klassischer Look.
- Verwandeln Sie es in ein Kissen: Verwandeln Sie Ihre Stickerei in ein gemütliches Kissen oder Kissen, Komfort mit Kreativität verbinden.
- Quilten Sie es: Fügen Sie Ihre Stickerei einem Quiltblock hinzu, Dadurch wird es zu einem herausragenden Element in einer größeren Steppdecke oder Wandkunst.
- Packen Sie es ein: Verwenden Sie Ihre Stickerei als Vorderseite einer Tragetasche oder Geldbörse, um Ihre Kunst unterwegs mitzunehmen.
- Hängen Sie es an eine Stange: Erstellen Sie eine einfache, aber elegante Bannerpräsentation, indem Sie Ihre Stickerei auf einer Dübelstange befestigen.
- Schattenbox-Anzeige: Rahmen Sie Ihr Stück in einer Schattenbox ein, um ihm Tiefe zu verleihen und andere Andenken daneben zu präsentieren.
- Leinwandmontage: Spannen Sie Ihre Stickerei über einen Leinwandrahmen für eine elegante und moderne Präsentation im Galeriestil.
Fazit
Rahmenstickerei in einem Stickrahmen ist eine einfache und unterhaltsame Möglichkeit, Ihre Stickerei schön aussehen zu lassen und sie sofort zur Schau zu stellen. Indem Sie dieser Anleitung folgen, Sie können Ihre Arbeit ordentlich einrahmen und Ihre Kreativität zur Schau stellen.
Bringen Sie Ihre Designs mit EMdigitizing auf die nächste Stufe! Wir bieten erstklassige Digitalisierungsdienstleistungen zu budgetfreundlichen Preisen mit blitzschnellen Bearbeitungszeiten. Erster Kunde? Genießen Sie ein Unglaubliches 50% Rabatt auf Ihre erste Bestellung!
Klick hier um mit EMdigitizing zu beginnen und Ihre Stickideen zum Leben zu erwecken.
Häufig gestellte Fragen
Die Verwendung eines Stickrahmens ist einfach! Legen Sie Ihren Stoff über den kleineren Innenrahmen, Dann bedecken Sie es mit dem größeren Außenrahmen. Ziehen Sie die Schraube fest und passen Sie den Stoff an, bis er glatt und fest ist.
Zum Einrahmen von Stickereien in einem quadratischen Stickrahmen, Zentrieren Sie Ihr Design sorgfältig, Stellen Sie sicher, dass es an den Kanten des Reifens ausgerichtet ist. Ziehen Sie den Stoff nach und nach fest und achten Sie dabei darauf, dass er gerade und faltenfrei bleibt.
Präsentieren Sie Ihren Stickrahmen mit einem Band zum Aufhängen, indem Sie es auf ein Regal oder eine Wand stellen, Oder verzieren Sie den Reifen sogar mit Spitze oder Farbe für zusätzlichen Flair.
Legen Sie den Stoff über den Innenrahmen und drücken Sie den Außenrahmen darüber. Während Sie den Reifen festziehen, Ziehen Sie den Stoff vorsichtig weiter, um ihn zu lockern und sicherzustellen, dass er straff gespannt ist.
Beginnen Sie mit dem Bügeln Ihrer Stickerei, um eventuelle Falten zu entfernen. Legen Sie es in den Reifen, Ziehen Sie vorsichtig an den Kanten, um den Stoff gleichmäßig zu dehnen, und sichern Sie es durch Anziehen der Bügelschraube.
