
Kann Stickerei entfernt werden, ohne das Tuch zu beschädigen?
Die Antwort auf diese Frage lautet "Ja". Es gibt verschiedene einfache Möglichkeiten, Stickereien aus den Kleidern zu entfernen, die Sie durch diesen Artikel kennenlernen werden.
Stickerei ist eigentlich eine sehr gute Möglichkeit, Stile hinzuzufügen oder Ihren Stoff zu dekorieren. If you want to remove embroidery due to some reasons then don’;Keine Sorge, Sie sind auf der richtigen Seite. Sie müssen nur unsere Anweisungen befolgen und können oder entfernen oder Konvertieren Sie Ihre Stickerei in Ihr gewünschtes Design.
Es gibt einige beste, aber einfachste Stickipps, die Sie in diesem Artikel lernen werden:
Also fangen wir an!
Techniken zum Entfernen von Stickereien: Best Tips &; Tricks
Was sind die Methoden zur Entfernung von Stickereien??
Stickereien bestehen aus Hunderten oder Tausenden von Stichen, und um sie zu entfernen, müssen Sie zu diesem Zweck jeden Stich abschneiden, Du wirst Geduld haben müssen.
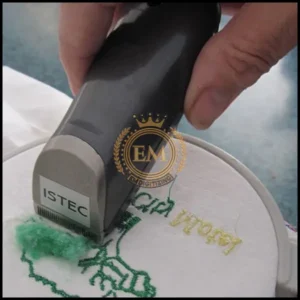
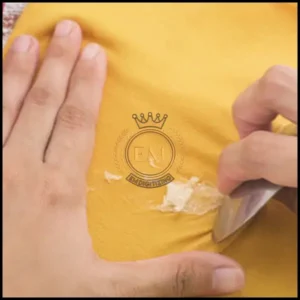
1. Stickeraser:
Ein Stickradierer oder Stichradierer ist eine der einfachsten Methoden zum Entfernen von Stickereien. Für diesen Zweck, Sie müssen es in einem Stoffladen oder online kaufen. Diese Radiergummis werden nicht empfohlen Handstickerei aber für Mützen ist es gut geeignet, Jacken, und Hemdlogos.
Wie Sie diese nutzen können, wird im Folgenden beschrieben:
Schritt # 1: Drehen Sie das Tuch um:
Zuerst, Sie müssen den Stoff umdrehen, damit die Rückseite sichtbar wird. Wenn Sie die Stickerei von der Rückseite entfernen, ist das Arbeiten viel einfacher, da die Stickerei auf der Rückseite dünner ist und der Radiergummi sie leichter durchschneiden kann.
Schritt # 2: Verwenden Sie einen Radiergummi über der Naht:
Dafür, Sie müssen den Radiergummi langsam über die Nähte überschreiten 1 Zoll (2.5 cm) Und dann heben Sie es hoch. Wiederholen Sie diesen Vorgang und sobald Sie die erste Zeile beendet haben, Gehen Sie zum zweiten und wiederholen Sie den gleichen Vorgang.
Mach weiter, bis du alle entfernt hast Stickmotive. Im Falle einer weniger Stickerei entfernen, Sie müssen es einmal tun.
Schritt # 3: Drehen Sie das Tuch nach vorne:
Jetzt vorne, du musst Stiche entfernen von Hand. Sie können eine Nadel oder einen Nahtripper unter den Stichen verwenden und sie dann hochziehen und die Fäden mit Hilfe Ihrer Finger herausziehen.
Schritt # 4: Wiederholung des Vorgangs (Bei Bedarf):
Sie müssen den Vorgang wiederholen, weil beim ersten Versuch nicht alles herauskommt.
Schritt # 5: Fuzz mit einer Fusselwalze entfernen:
Mit einer Fusselwalze wird der Gewindestaub aus dem Stoff entfernen. If you don’;Ich habe eine Fusselwalze, dann können Sie für diesen Zweck ein Maskierungsband verwenden. Entfernen Sie den Gewindestaub sowohl von der Rückseite als auch von vorne. Einige Themen oder Stiche können ebenfalls enthüllt werden.
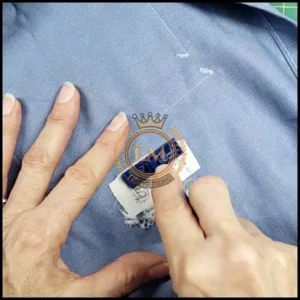
2. Nahttrenner:
Schritt # 1: Den Stoff umdrehen:
Dafür, Sie müssen das Tuch umdrehen, da das Arbeiten von hinten empfohlen wird. Wenn Sie von vorne arbeiten, gibt es die Chancen, dass Sie den Stoff möglicherweise zum Stoff steigen.
Schritt # 2: Die Stiche schneiden:
Schieben Sie den Nahtripper unter die Stiche, die Sie entfernen haben. Nach dem Gleiten durch die Stiche, Heben Sie es nach oben. Seam Ripper enthalten eine Klinge, die die Fäden durchschneidet.

Schritt # 3: Entfernen von Stichen von der Vorderseite:
Sie können leicht Stiche von der vorderen Seite entfernen, indem Sie eine Verdichtungsnadel verwenden. Schieben Sie die Nadel unter die Stiche und heben Sie sie weg.
Schritt # 4: Wiederholen Sie den Vorgang:
Der Vorgang sollte wiederholt werden, es sei denn, die gesamte Stickerei wird entfernt.
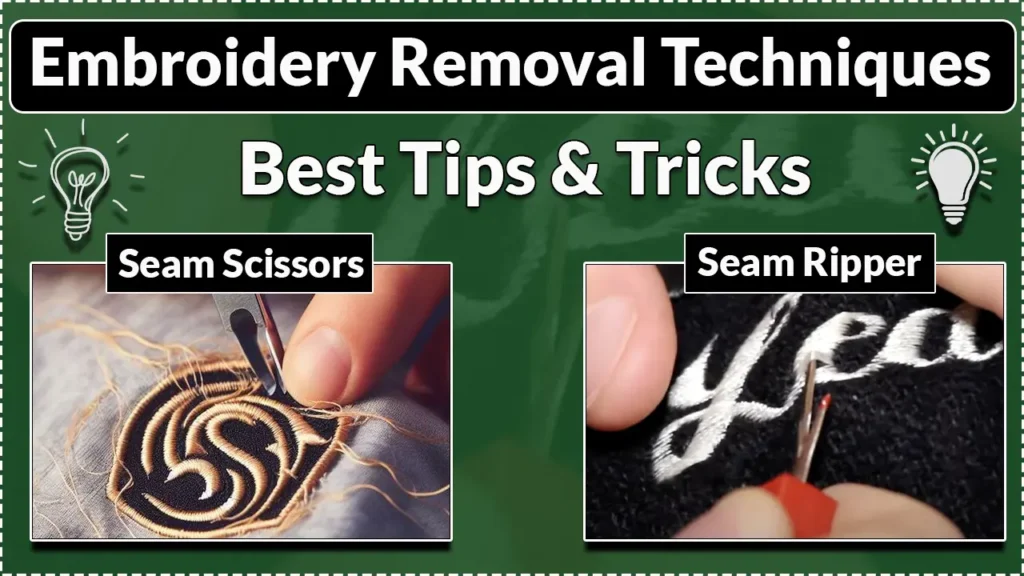
3. Stickschere:
Stickerei sind speziell so konzipiert, dass sie die Gewinde oder winzigen Ausschnitte des Stoffes schneiden. Diese sind klein, scharf und sorgen für einen komfortablen Griff. Diese werden für empfohlen Kleine gestickt Bereiche.
Das Verfahren ist wie folgt:
Schritt # 1: Drehen Sie das Tuch:
zuerst, Drehen Sie das Tuch nach hinten, damit die Fäden leicht entfernt werden können, ohne den Stoff zu beschädigen.
Schritt # 2: Schneiden Sie die Fäden:
Mit Hilfe einer Scherenspitze, Schieben Sie die Fäden so, dass der Stoff nicht beschädigt ist. Im Falle einer großen Stickerei, Schalten Sie die Fäden nur ein paar Zentimeter oder Zentimeter gleichzeitig ab.
Schritt # 3: Sich zur vorderen Seite drehen:
Nachdem Sie die rechte Seite des Tuches gedreht haben, Schneiden Sie die Stiche. Stellen Sie sicher, dass alle Fäden von beiden Seiten entfernt wurden.
Schritt # 4: Reinigen Sie den Bereich:
Sowohl die Vorder- als auch die Rückseite des Tuches sollten gereinigt werden und die Löcher sollten mit Hilfe einer Fusselwalze entfernt werden.
So entfernen Sie Stickerei?
Wie man einen bekommt gestickter Patch aus?
Es hängt von der Art der Unterstützung ab, ob es ein ist Bügelnfleck oder ein Nähflecken. Es gibt drei Methoden zum Entfernen von Patches, die wie folgt sind:
1. Bügeln verwenden:
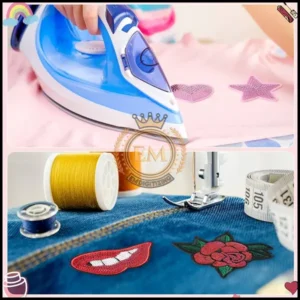
- Decken Sie den Patch mit einem dünnen Tuch oder Wachspapier ab.
- Schalten Sie das Bügeleisen ein und drücken Sie den überdachten Fleck für etwa 15 Sekunden.
- Heben Sie nun die Abdeckung an und prüfen Sie, ob die Kante des Flecks gelockert wird.
- Wenn der Patch nicht weich ist, bedecken Sie wieder und bedecken Sie sie Bügeln Sie den Fleck.
- Wenn Sie sehen, dass der Klebstoff weich.
2. Verwenden Sie einen Klebstoffentferner:
- Dafür, Sie müssen Ihr Tuch oder Stoff umdrehen.
- Nehmen Sie nun Ihren Klebstoffentferner und wenden Sie ihn auf die Rückseite des Patchs an.
- Reibe die Flüssigkeit eine Minute in das Tuch.
- Überprüfen Sie nun, ob das Patch vollständig oder teilweise entfernt ist.
- Wenn das Patch entfernt wird, schneiden Sie es mit dem ab Hilfe von Scheren.
3. Entfernen eines bestickten Sew-On-Patchs:
- Zuerst, Beugen Sie den Stoff so, dass die Stiche aus dem Patch enthüllt werden.
- Drücken Sie nun die geschwungene Klinge der Nahtripper gegen die Nähte.
- Seien Sie sanft, indem Sie dies tun, weil Sie Ihren Stoff schneiden könnten.
- Der Nahtripper sollte auf den Stich zentriert sein und die Klinge dagegen drücken der Faden.
- Wiederholen Sie diesen Schritt, es sei denn, der Patch wird aus dem Tuch gehoben.
- Verwenden Sie eine Pinzette oder eine Schere, um zusätzliche Fäden aus dem Tuch zu entfernen.
Endeffekt:
Das Entfernen der Stickerei mag kühn erscheinen, aber wenn Sie den oben genannten Techniken folgen, wird es für Sie viel einfacher. Das einzige, was Sie tun müssen, ist geduldig zu sein.
Wenn Sie an einem Stickprojekt jeglicher Art interessiert sind, dann EMdigitalisieren ist die beste Option für Sie. Wir bieten Stickerei digitalisieren und Vektorkunstdienste mit einer schnellen Bearbeitungszeit. Sie können auch unsere Website besuchen und sich über unsere besten Dienstleistungen informieren.
Wir bieten auch ein tolles 50% Rabatt auf alle unsere Dienstleistungen für unsere angesehenen Erstkunden. Wir bieten auch kostenlose Angebote an, die direkt erstellt werden 5 Protokoll.
Schnappen Sie sich dieses zeitlich begrenzte Angebot und bringen Sie Ihr Stickprojekt mit EMdigitizing auf die nächste Stufe.
Wenn Sie Fragen zu diesem Thema haben, du kannst sie fragen. Vielen Dank, dass Sie sich die Zeit genommen haben, diesen Artikel zu lesen.
Häufig gestellte Fragen:
Die schnellste Art, die Stickerei zu entfernen. Beide können Ihre Arbeit erleichtern.
Die beste Technik zum Entfernen der Stickunterstützung ist die Verwendung von Eisen oder den Klebstoffentferner, aber Sie müssen sehr vorsichtig sein, da dies Ihren Stoff beschädigen könnte.
Eine der einfachsten Möglichkeiten, Stickstiche zu entfernen, ist die Verwendung eines Nahtrippers. Es hilft beim Schneiden von Faden, ohne Ihren Stoff zu beschädigen.
Stickstiche können leicht von einem Stichgummi entfernt werden, Nahttrenner, Trimmer, oder Stickerei.
Die schwierigen Stiche können durch die Verwendung eines Stickerasers leicht entfernt werden, Nahttrenner, oder Pinzetten. Durch Verwendung eines dieser, Nehmen Sie den Stich, den Knoten hochziehen, und den Stich schneiden.


