Haben Sie sich jemals gefragt, warum Ihr gestickliches Foto nicht ganz richtig aussieht?? Vielleicht sind die Augen zu verschwommen, Oder das Gesicht sieht flach aus. Das liegt daran, dass Fotos digitalisieren ist nicht so einfach wie das Klicken auf eine Schaltfläche. Es ist ein sorgfältiger Prozess, der Kunst und Technik kombiniert, und wenn falsch gemacht, Das endgültige Design wird sich einfach nicht richtig anfühlen.
In diesem Ratgeber, Wir werden Sie durch fünf Dinge führen, über die die meisten Menschen nie sprechen, wenn es um die Photo -Digitalisierung geht. Egal, ob Sie gerade erst anfangen oder zuvor versucht und gescheitert sind, Diese Erkenntnisse helfen Ihnen, es zu vermeiden Häufige Fehler und schön erreichen, stitch-fähige Ergebnisse.
5 Dinge, die Sie vor der Digitalisierung von Fotos für Sticken wissen sollten
1. Nicht jedes Foto kann zum Sticken verwendet werden
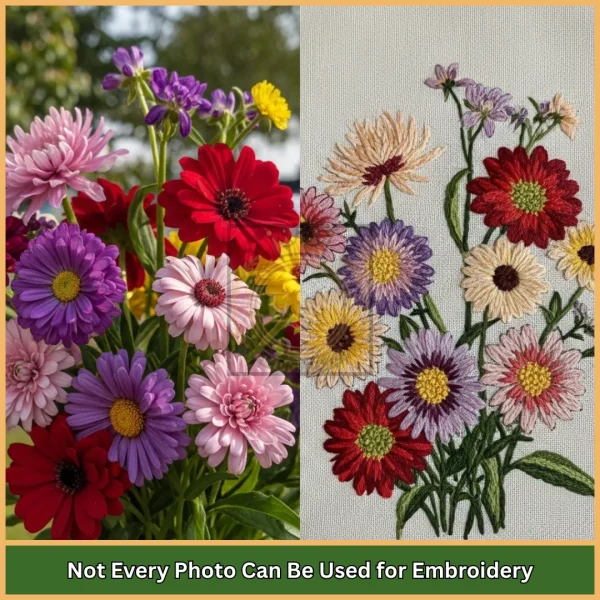
Das könnte Sie überraschen, Aber nicht jedes Foto ist stickfreundlich.
Wir haben gesehen, dass es viel passiert ist: Jemand sendet ein Gruppenfoto oder ein dunkles Selfie, Und sie erwarten, dass es auf einem Stoff gut genäht aussieht. Aber das ist einfach nicht realistisch.
Lassen Sie mich erklären, warum.
Stickmaschinen Kann nicht raten, was auf einem Foto wichtig ist. Also, wenn das Bild zu dunkel ist, verschwommen, oder hat einen geschäftigen Hintergrund, Die Maschine wird verwirrt, Und das Ergebnis sieht nicht gut aus.
Folgendes sollten Sie also tun:
- Wählen Sie einen hellen, Klares Foto
- Stellen Sie sicher, dass das Gesicht oder das Hauptfach sichtbar sind
- Vermeiden Sie unordentliche Hintergründe
2. Ihr Foto hat zu viele Farben für Stickereien
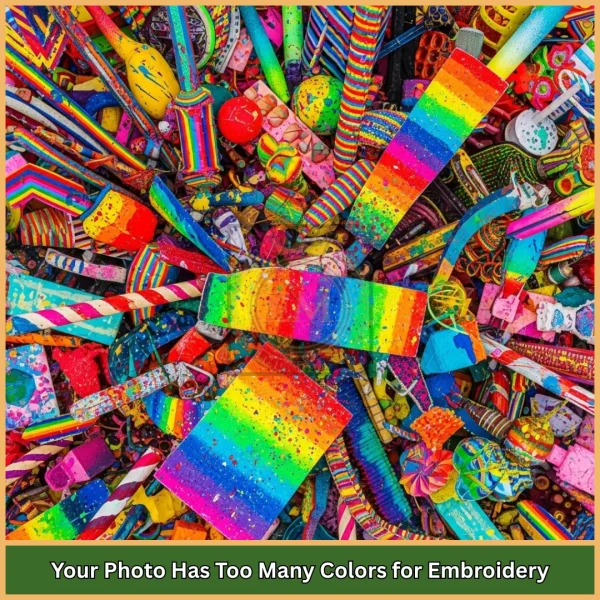
Ihr Telefon zeigt Tausende von winzigen Farbtönen, Aber Stickmaschinen? Nicht einmal in der Nähe.
Die meisten Maschinen unterstützen nur 6 zu 15 Fadenfarben in einem Design.
Also, wenn Sie es versuchen Digitalisieren Sie Fotos für Stickereien, Wir müssen klug arbeiten, Farben mit Fäden mischen, Licht und Schatten mit Stitch -Richtung zeigen, und Erstellen von Details mit Textur anstelle von weiteren Farben.
So verwandeln wir ein Foto in etwas, das immer noch real aussieht, aber mit nur einer Handvoll Fäden.
3. Stichtypen sind wirklich wichtig (Ja, Wirklich!)
Lassen Sie mich Sie etwas fragen.
Wenn Sie ein Bild gemalt haben, Würden Sie den gleichen Pinsel für den Himmel verwenden?, die Augen, und die Schatten?
Natürlich nicht! Nähen funktioniert auf die gleiche Weise.
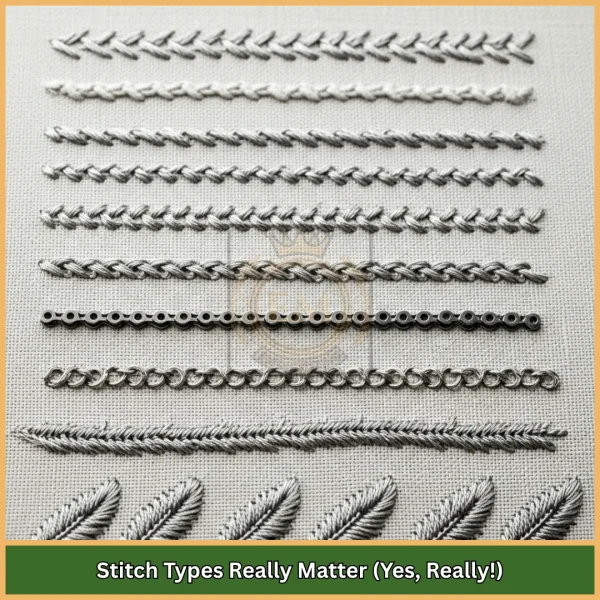
Für verschiedene Teile werden verschiedene Stichtypen hergestellt:
- Füllen Sie Stiche = große Bereiche wie Hintergrund
- Satinstiche = Grenzen und kühne Umrisse
- Manuelle Stiche = kleine Gesichtsdetails, Wie Lippen oder Augen
Viele Anfänger füllen einfach das gesamte Design mit einem Stich, Und es sieht am Ende flach oder umständlich aus.
Wenn du bist Fotos digitalisieren Für die Maschinenstickerei, Jeder Stich muss mit Sorgfalt ausgewählt werden. So erhalten Sie Ergebnisse, die tatsächlich wie die wahre Person oder Szene aussehen.
4. Mehr Stiche bedeutet keine bessere Qualität
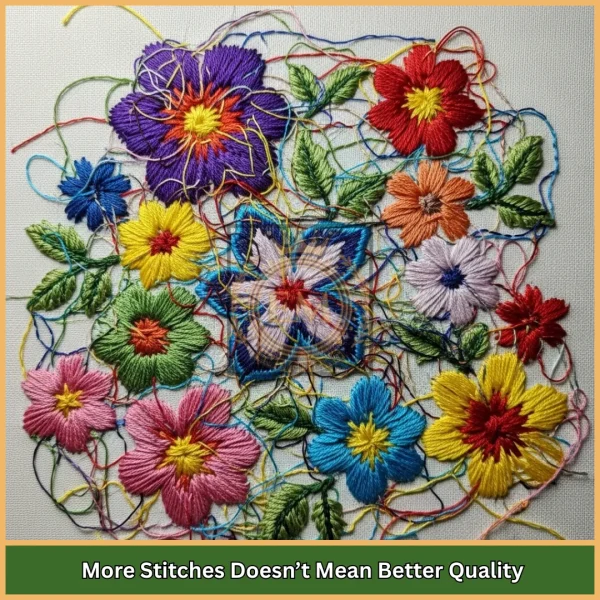
Hier ist ein Mythos, den wir platzen müssen: mehr Stiche = besseres Ergebnis.Falsch.
Wenn Ihr Design zu viele Stiche hat, es kann:
- Jammierst deine Maschine
- Ursache Fadenbrüche
- Machen Sie das Design zu dick oder steif
Aber wenn es zu wenige Stiche hat, Es kann verblasst oder unvollständig aussehen.
Deshalb ist das Gleichgewicht alles.
Wir testen unsere Dateien immer in Fotos digitalisieren Sticksoftware Erste, Überprüfung der Stichdichte, Extras trimmen, und Fluss einstellen, Um sicherzustellen, dass das Design sauber ist, glatt, und stickbar.
5. Software kann nicht alles tun - Manuelle Bearbeitung ist der Schlüssel
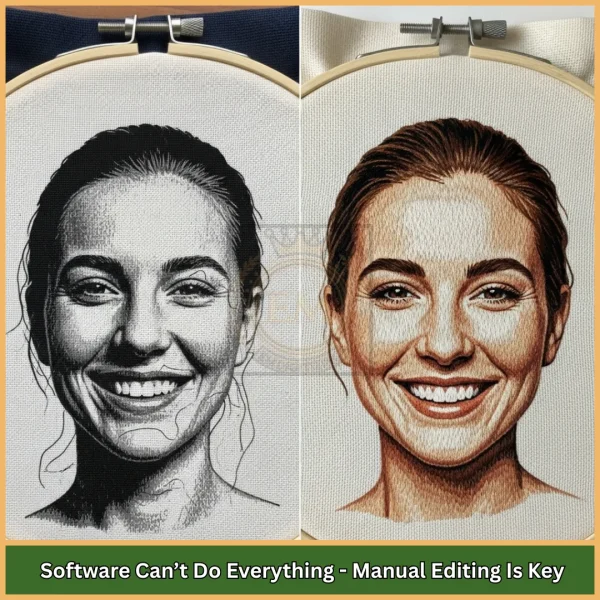
Sie denken vielleicht, dass Software heutzutage alles bewältigen kann. Laden Sie einfach das Foto hoch und erhalten?
Nein. Auch die besten Tools können nicht sehen, was Sie sehen.
Zum Beispiel:
- Ein Computer weiß nicht, wo die Wange endet und der Schatten beginnt
- Es kann die Emotionen in jemandes Lächeln nicht spüren
- Und es wählt nicht immer die besten Threadpfade aus
Deshalb tun wir immer manuelle Bearbeitung nach Software. Wir stimmen die Stiche gut ab, Glätten Sie die Kanten, und passen Sie alles an, damit das Foto beim Nähen lebensecht aussieht.
So erwecken wir Ihr Foto zum Leben, der richtige Weg.
Fazit
Seien wir ehrlich: Fotos digitalisieren Ist nicht etwas, das jemand tun kann?.
Es ist nicht wie digitalisierende Logos, die einfacher und mutiger sind. Fotos sind persönlich. Sie haben Emotionen, Kleine Details, weiche Schatten, Dinge, die eine menschliche Berührung brauchen.
Deshalb hilft es wirklich, jemanden mit Erfahrung auszuwählen. Bei EMdigitizing, Wir wissen, wie man Fotos für Stickereien richtig digitalisieren. Wir verwenden gute Tools wie Foto digitalisiert für Sticksoftware, Wir überprüfen aber auch alles von Hand, um sicherzustellen, dass es perfekt aussieht.
Wenn Sie sich über die Digitalisierung wundern, Wir sind hier, um es Ihnen leicht zu machen. Sie erhalten klare Ergebnisse, Schnelle Lieferung, und selbst 50% Aus Ihrer ersten Bestellung. Ob es für ein Geschenk ist, Erinnerung, oder Ihr Geschäft, Wir sind bereit zu helfen.
Jetzt bestellen Und lassen Sie uns Ihr Foto in ein umwandeln Schönes Stickdesign, Mit Sorgfalt und Qualität können Sie vertrauen.
Häufig gestellte Fragen
Ein Bild digitalisieren, Sie müssen Sticksoftware verwenden, die das Bild in eine Stichdatei umwandeln kann. Reinigen Sie zuerst das Bild, Dann manuell Stiche anpassen, um bessere Ergebnisse zu erzielen.
Wählen Sie zunächst ein klares Bild aus, Verwenden Sie dann die Digitalisierungssoftware, um Stichtypen zu verfolgen und zuzuweisen. Testen Sie die Datei, bevor Sie sie auf Fabric verwenden.
Zu den beliebten Softwareoptionen gehört Wilcom, Luke, Tinte/Stich, und Bruder PE Design. Wählen Sie eine basierend auf Ihrer Qualifikationsstufe und Ihrer Maschinenkompatibilität aus.
Verwenden Sie eine hochauflösende Grafik mit klaren Umrissen. Entfernen Sie unnötige Details und vereinfachen Sie die Farben, um das Design stickfreundlich zu gestalten.
Umwandeln Sie das PDF in ein Bildformat (wie JPG oder PNG) Erste. Importieren Sie es dann in Sticksoftware und digitalisieren Sie die Elemente manuell.
Emdigitisierung ist ein vertrauenswürdiger Name mit jahrelanger Erfahrung in Digitalisierung von Fotos für Maschinenstickerei, Schnelle Turnaround- und Expertenqualitätsergebnisse anbieten.
