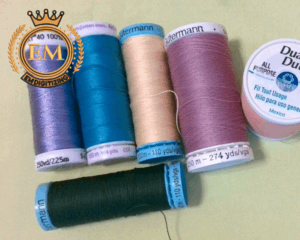
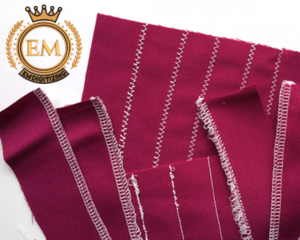
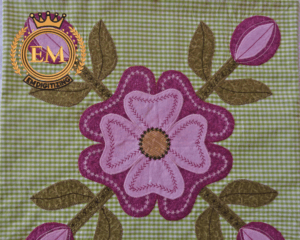
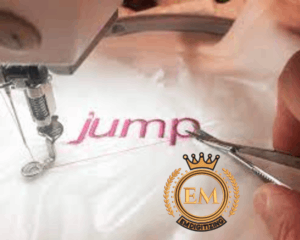
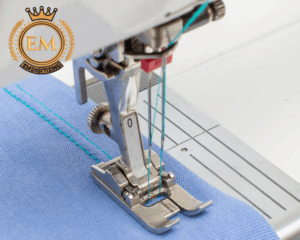
10 Schritte zur Vermeidung von Stickmaschinenfehlern

10 Schritte zur Vermeidung von Stickmaschinenfehlern

In diesem Artikel, we’;ll outline 10 steps you can take to avoid common embroidery machine mistakes.

10 Steps To Avoiding Embroidery Machine Mistakes

10 Steps To Avoiding Embroidery Machine Mistakes​

Einführung:

Embroidery machines are a valuable tool for creating intricate and beautiful designs on a wide range of fabrics. Jedoch, like any machine, they can be prone to errors and mistakes. These mistakes can be frustrating and costly, especially if they result in ruined garments or wasted materials. To avoid embroidery machine mistakes, it’;s important to follow some basic guidelines and best practices.

10 Schritte zur Vermeidung von Stickmaschinenfehlern:

Embroidery Mistake 1: Walking Away From Your Embroidery Machine

Walking Away From Your Embroidery Machine

It’;s essential to stay near your machine while it’;s in operation to avoid mistakes and prevent damage to the machine. When you’;re not watching the machine, it can get jammed or even overheat, which can damage the machine and the fabric. Um es zu umgehen, be sure to stay close to your machine while it’;s running and keep an eye on the stitching. If you need to leave the room or step away from the machine for a moment, always pause or stop the machine first.

Embroidery Mistake 2: Trying To Hoop Everything

Trying To Hoop Everything

Not all fabrics can or should be hooped. Hooping can stretch or distort delicate fabrics, and some fabrics may require alternative hooping methods such as adhesive stabilizers or floating techniques. To avoid mistakes, it’;s important to use the correct hooping method for each fabric. For delicate or stretchy fabrics, consider using a stabilizer or backing to prevent distortion during stitching.

Embroidery Mistake 3: Not Using Stabilizer Or Using The Wrong Kind

Not Using Stabilizer Or Using The Wrong Kind

Stabilizer is crucial to prevent fabric from shifting or stretching during stitching. Not using stabilizer or using the wrong kind can result in uneven or distorted stitching, and even damage to the fabric. Choose the appropriate type of stabilizer for your fabric and Stickerei-Design. Zum Beispiel, heavy-duty stabilizer is necessary for dense embroidery designs or fabrics with a lot of stretch, while lightweight stabilizer may be used for more delicate fabrics or designs.

Embroidery Mistake 4: Using The Wrong Type Of Thread

Using The Wrong Type Of Thread

Using the wrong type of thread can lead to stitching problems, Faden reißt, and even damage to the embroidery machine. Always use the appropriate thread type and weight for your embroidery design and fabric. Zum Beispiel, if you’;re working with a delicate or stretchy fabric, use a thinner and more flexible thread. If you’;re working with a dense design or a thicker fabric, use a heavier thread.

Embroidery Mistake 5: Not Test Stitching

Not Test Stitching
Not Test Stitching

Test stitching is one of the most crucial steps in the embroidery process. It involves running a test stitch of the design on a scrap piece of fabric to check for any potential issues before stitching on the actual garment or fabric. Test stitching can help you determine whether your design is too dense or too sparse, whether your thread tensions are balanced, and whether your stabilizer is appropriate for the fabric. It can also help you determine the appropriate speed and needle settings for your machine.

To perform a test stitch, start by hooping a scrap piece of fabric and stabilizer. Choose a section of the design that has a lot of different elements such as angles, curves, or fine details. Stitch out the design and evaluate the results. Look for any gaps or overlaps in the stitching, any thread breaks or shredding, and any puckering or distortion in the fabric. If any issues are detected, make adjustments to the design, Fadenspannung, or stabilizer, and run another test stitch until you are satisfied with the results.

Embroidery Mistake 6: Picking The Wrong Type Of Embroidery Or Appliqué Design For The Wrong Fabric

Picking The Wrong Type Of Embroidery Or Appliqué Design For The Wrong Fabric

Not all embroidery or appliqué designs are created equal, and not all designs are suitable for all fabrics. Choosing the wrong type of design for your fabric can lead to puckering, Verzerrung, or tearing. Zum Beispiel, dense designs may not work well on delicate fabrics, while designs with a lot of small details may not show up well on darker fabrics. Always consider the weight, Textur, and stretch of the fabric when selecting an embroidery or appliqué design.

In addition to choosing the appropriate design, it’;s important to use the appropriate embroidery or appliqué technique for your fabric. Some fabrics may require alternative hooping methods such as adhesive stabilizers or floating techniques. Appliqué designs may require a different type of stabilizer or fabric adhesive to ensure that the fabric stays in place during stitching.

Embroidery Mistake 7: Not Trimming Jump Stitches Between Each Thread Color

Not Trimming Jump Stitches Between Each Thread Color_11zon

Jump stitches are the small threads that connect one section of stitching to another. They are essential to the embroidery process, but failure to trim them can result in a messy and uneven finished product. Leaving jump stitches can also cause the design to snag or catch on other objects, causing damage to the garment or fabric.

To trim jump stitches, use a pair of embroidery scissors to carefully snip the thread as close to the fabric as possible. Be careful not to cut any of the surrounding stitches or fabric. Manche Stickmaschinen have a built-in function that automatically trims jump stitches, but it’;s still important to check for any remaining threads and trim them as needed.

Embroidery Mistake 8: Not Taking The Time To Double Check Everything Before Starting To Stitch

Not Taking The Time To Double Check Everything Before Starting To Stitch

Embroidery mistakes can be costly and time-consuming, so it’;s important to take the time to double-check everything before starting to stitch. Before beginning the embroidery process, double check everything, including the design, Garnfarbe, and stabilizer placement. Make sure that you have the correct hoop size and that your machine settings are appropriate for your fabric and design. This can prevent mistakes and ensure a successful project.

Embroidery Mistake 9: Not Organizing Files

Not Organizing Files

Embroidery files can become disorganized and difficult to navigate if not properly labeled and stored. This can lead to mistakes when selecting the wrong design or thread color. Zusätzlich, it can be frustrating and time-consuming to search for a specific design or file.

To avoid this mistake, organize embroidery files and keep track of designs and colors used. This can be done by creating a filing system that is easy to navigate and consistently labeling each file with relevant information. Use clear and concise naming conventions and keep track of design and thread colors used.

Embroidery Mistake 10: Not Maintaining The Machine

Not Maintaining The Machine

Regular cleaning and maintenance of the embroidery machine is important to prevent costly repairs and ensure optimal performance. Follow manufacturer guidelines for maintenance and cleaning. This can include cleaning the bobbin area, oiling moving parts, and replacing worn needles.

Zusätzlich, it is important to use high-quality supplies, including thread and stabilizer, to prevent unnecessary wear and tear on the machine. Always use the appropriate type and weight of thread for your embroidery design and fabric. This can prevent thread breaks, tension issues, and other embroidery machine mistakes.

Fazit:

Embroidery can be a fun and rewarding hobby or business, but it can also be frustrating when things go wrong. By following these 10 steps to avoiding Stickmaschine Fehler, you can increase your chances of success and enjoy the process of creating beautiful designs on a wide range of fabrics. Remember to choose the right design, check your tension, use the right stabilizer, clean your machine regularly, use the right needle, keep an eye on your thread, test your design, use the right hooping technique, pay attention to your machine’;s speed, and practice regularly to improve your skills. With these tips in mind, you can avoid common embroidery machine mistakes and create beautiful, high-quality embroidery designs.

Wir hoffen, dass Ihnen das Lesen dieses Artikels genauso viel Spaß gemacht hat wie uns das Schreiben.

Wenn Sie die Digitalisierung des Sticklogos anpassen möchten, EM-DIGITALISIERUNG wird Ihre beste Wahl sein. Bei EM DIGITALISIEREN, we deliver the best embroidery logo digitizing Dienstleistungen mit bester Qualität. Wir bieten 50% Rabatt auf alle unsere Dienstleistungen für unsere potenziellen Kunden bei ihrer ersten Bestellung. So, Fordern Sie jetzt ein kostenloses Angebot an und wir werden uns mit Ihnen in Verbindung setzen.

Ich hoffe, dieser Artikel wird für euch hilfreich sein!

Wenn Sie Fragen zu diesem Artikel haben, können Sie uns gerne einen Kommentar hinterlassen. Und, danke fürs Lesen!

Sie können auch mögen

To fix an embroidery machine mistake, you first need to identify the problem. Some common mistakes include thread breaks, stitching errors, and design placement issues. Once you have identified the problem, you can try rethreading the machine, adjusting the tension, or using a seam ripper to remove the mistake and redo the stitching.

Embroidery defects can be reduced by using quality materials, such as high-quality thread and stabilizers. Proper hooping technique and tension adjustments can also help to prevent puckering or misalignment. Regular maintenance of the machine, such as cleaning and oiling, can also prevent thread breaks and other issues.

Embroidery marks can be removed by using a product such as a fabric eraser or a pre-treatment spray. These products can help to remove any residue left behind from the embroidery process. It’;s important to follow the instructions on the product carefully to avoid damaging the fabric.

To fix embroidery tension, you can start by checking the threading on the machine. Make sure the thread is properly seated in the tension disks and that there are no knots or tangles in the thread. Adjust the tension on the machine by turning the tension knob or using the digital settings. Test the tension by sewing a small sample to see if the thread is balanced and not too loose or too tight.